Paper or Card for a Cut-Paper Study? Choose by Flex, Weight, and Edge
Choose paper or card for a cut-paper study by matching flexibility, weight, and edge quality to your composition, so pieces are easier to place and handle.
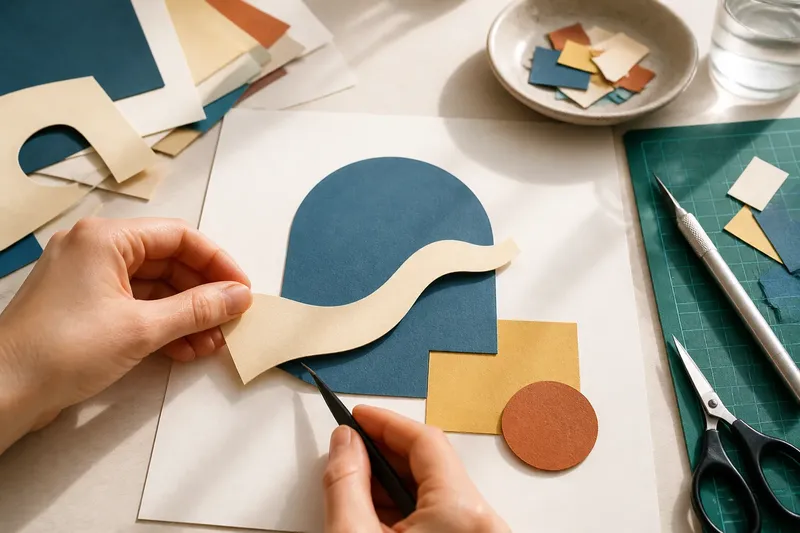
The common mistake in a cut-paper study is choosing a surface by color alone, then discovering that it buckles under glue or fights a clean cut. For a small composition, paper or card affects how pieces bend, sit, overlap, and hold their edges. Choose the surface for the job each piece must do, not just for how it looks on the stack.
What is the difference between paper and card for a cut-paper study?
Paper is generally more flexible and easier to fold, curve, or cut in several layers; card is generally stiffer and more able to hold a flat shape. The labels are not precise standards, so handle the actual sheet before deciding. A dense paper may feel firmer than a light card, and surface coating can change how a blade moves.
Think of flexibility, weight, and edge as three separate choices. Flexibility affects how a piece responds to handling. Weight affects how it rests on the backing and how much support it needs. Edge describes the cut line: it may look crisp, soft, fuzzy, or layered, depending on the material and tool.
For a small study, you do not need a single material throughout. A thin sheet can make a soft, folded element, while a firmer piece can anchor a shape that should stay flat. The combination is useful only if the different surfaces serve a visible purpose; mixing materials just to add variety can make the composition harder to control.
When should I choose paper instead of card?
Choose paper when the composition depends on pliable shapes, close overlaps, or easy adjustment. It can be useful for narrow strips, curled forms, and pieces that need to settle against an uneven backing. Paper also tends to make it easier to cut several related pieces without the resistance of a heavier sheet.
Its flexibility can be a drawback. A broad, unsupported paper shape may curl, wrinkle, or shift as adhesive is applied. If the piece needs to remain flat, use a firmer backing or consider making the shape from a stiffer material. For especially delicate shapes, keep the cuts simple enough that the narrow connections do not tear during placement.
Try ordinary drawing paper or colored construction paper for a first pass. Drawing paper gives a comparatively restrained surface, while construction paper can provide color without a glossy finish. Compare the offcut from each: bend it gently, cut a short curve, and inspect the edge. This quick handling check tells you more about the sheet in your hand than its name on a package.
When does card make a better surface?
Choose card when a shape should keep its outline as you move it, or when the composition calls for a firm, graphic edge. Card can help broad blocks and simple silhouettes stay flat. It can also provide a stronger visual contrast against flexible pieces, giving the arrangement a deliberate change in character.
Stiffness has limits. Thick card may resist small curves, make intricate cuts awkward, and create a raised ridge where one piece overlaps another. If your composition relies on many close layers, that extra height can make the surface feel crowded. A thinner card may be a better compromise than the heaviest sheet available.
Notice how the blade feels rather than forcing it through. A utility knife or craft knife can give control for straight edges and interior openings, while scissors may suit loose curves and broad shapes. Use a self-healing cutting mat beneath knife work, and keep the blade moving away from your fingers. Follow the tool maker’s directions and any material guidance on the package.
How does weight affect cutting and placement?
Weight changes how readily a cut piece stays where you put it. A lightweight piece can be nudged into a precise overlap but may lift or ripple. A heavier piece is easier to pick up and position without bending, yet it can sit proud of the backing and make adjacent edges less flush.
Before gluing, arrange the pieces dry on the backing. Lift and replace each shape once or twice to see whether it keeps its form. If a flexible piece becomes limp in your fingers, support it with a scrap of paper while moving it. If a stiff piece repeatedly catches on an adjacent edge, adjust the overlap or cut a simpler shape.
Adhesive also changes the result. A wet glue can introduce moisture and encourage thin paper to buckle; a glue stick or adhesive tape may be easier to control for a small, flat study. Use a light, even application and check that the adhesive is suitable for the paper. Avoid adding more glue as a fix for a piece that is already rippling; let it settle, then decide whether to replace or redesign that shape.
What do the cut edges tell me?
The edge is part of the image, not just a boundary to hide. A clean, firm edge can make a shape feel precise. A slightly soft or fibrous edge can make it feel less mechanical. The choice depends on the composition: a crisp silhouette may call for card and a sharp blade, while a torn paper edge can create a more irregular transition.
Test the edge on a small scrap before cutting the final shape. Cut a straight line and a curve, then look at both from the distance you expect viewers to see the study. If the cut looks ragged, check whether the scissors are dull or the blade is dragging. If the material frays because of its fibers, that may be a useful texture rather than a defect.
Layering changes the edge again. Two thin sheets can produce a fine, low ridge; a paper shape over card makes a more noticeable step. Keep the overlap visible where it helps clarify which form sits in front. Where a thick ridge distracts, reduce the number of layers or use a lighter sheet for the upper shape.
Which surface should I use for curves, detail, and broad shapes?
Match the sheet to the cut you need. These are useful starting points, not fixed rules:
- Long, narrow curves: Try flexible paper if the strip must bend, but make it wide enough to handle without tearing.
- Small geometric pieces: Try light card when you need the corners to remain clear during placement.
- Broad flat shapes: Use a firm sheet or attach flexible paper to a supportive backing.
- Fine interior openings: Use a material and blade that cut cleanly without excessive force; simplify the opening if the edge breaks up.
- Visible torn texture: Use paper with fibers that produce an edge you like, and tear a scrap first to see how it behaves.
Say you are making a small composition with one broad block, a curved strip, and a narrow accent. You could cut the block from thin card, the curve from drawing paper, and the accent from a scrap of colored paper. Arrange them dry; if the strip buckles, replace it with a firmer sheet, and if the accent’s edge disappears, choose a contrasting color or a cleaner cut. Each adjustment answers a visible problem rather than adding material for its own sake.
What should I ask before choosing a sheet?
Can I use mixed paper and card in one study?
Yes, if each surface has a clear role, such as a firm base shape beside a flexible curve. Keep the number of material changes modest so the edges and overlaps remain easy to read.
Should I use the same sheet for the backing and the cut shapes?
Not necessarily. A stable backing can support lighter cut pieces, while a cut shape may need a different weight to hold its outline. Choose a backing that stays flat under the adhesive you plan to use.
How can I tell whether a sheet is too thick?
Cut a test curve and place it beside another piece. If the edge resists the cut, the curve springs up, or the overlap makes a distracting ridge, try a lighter sheet or a simpler outline.
Is glossy paper a good choice?
Glossy paper can create a deliberate sheen, but its surface may affect how adhesive holds and how a blade travels. Test a scrap first; if the finish distracts or the piece slips during assembly, choose an uncoated sheet instead.
What is not worth the effort?
It is not worth comparing every sheet in a supply drawer or building a complicated sampler before making a small study. Test only the materials that could solve a real problem in the composition: a curl, a weak edge, a difficult cut, or a bulky overlap. Keep the offcuts beside the work so you can compare them at a glance.
For a cut-paper study, the best choice is the sheet that makes the intended shape manageable and gives its edge the character you want. Start with a few scraps, cut the actual kinds of forms in the composition, and arrange them without adhesive. That small decision is usually enough to tell whether paper, card, or a restrained mix will let the study sit as you intend.